How to Get the Most Out of Your Glass
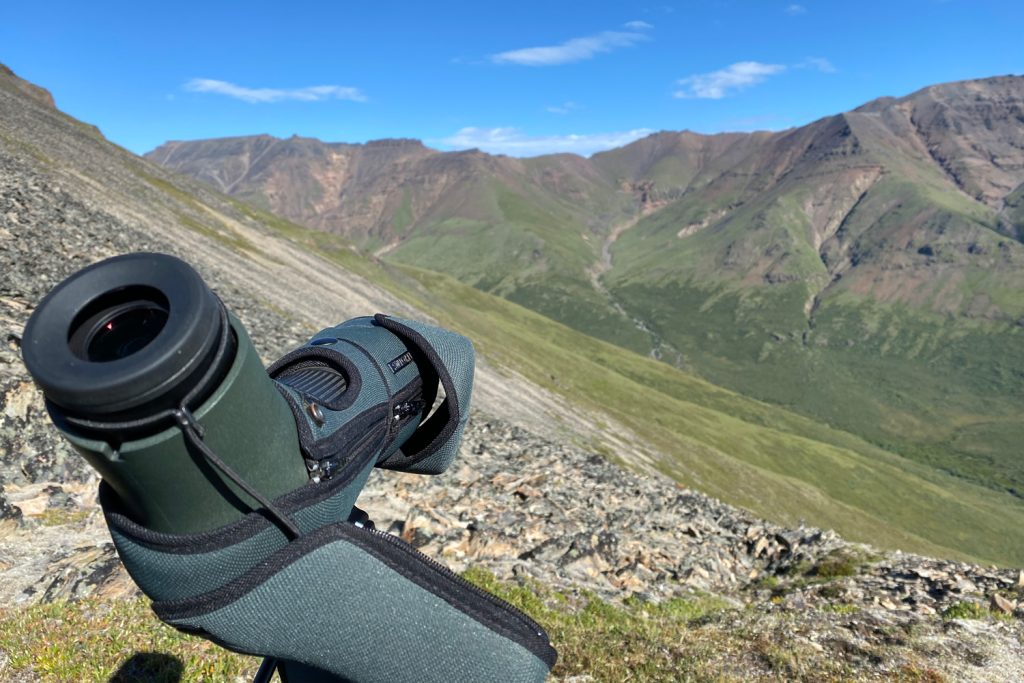
Optics have become one of the essential pieces of gear for just about any big game hunt. They can save us many miles of hiking in order to assess game, and they allow us to look at animals without having to be very close and risk spooking them. Optics are one of the biggest advantages we have on a hunt. In order to get the most out of your glass there’s several easy things you can do.
Test before buying
Optics are usually a pretty big investment. Just like you wouldn’t buy a car without test driving it, you need to test out the optics you plan to buy before purchasing them. And don’t just look through them at the far wall of the sporting goods store. Try to find a way to get access to borrow or test the optics you’re thinking of buying in a real life situation, like looking at a hillside at dusk. This will be the best testing you can do before buying. Try to borrow the optics from a friend or family member, or see if a store will let you take them on a ‘test drive’, and maybe you leave some collateral behind. Bottom line, do whatever you can to be able to look through the optics you’re thinking of purchasing in a real life scenario. No one is planning to hunt signs or clocks on a store wall, so don’t look at those objects to test out optics you’re thinking about purchasing.
Become familiar with optics-related terms
There’s some terms that you’ll see frequently when researching optics, and it can help to have a basic understanding of what the terms mean. They may not sway your decision to buy or not to buy, but it can be beneficial to understand a little about what the numbers mean.
Field of view:
The observable area visible when looking through the optics.
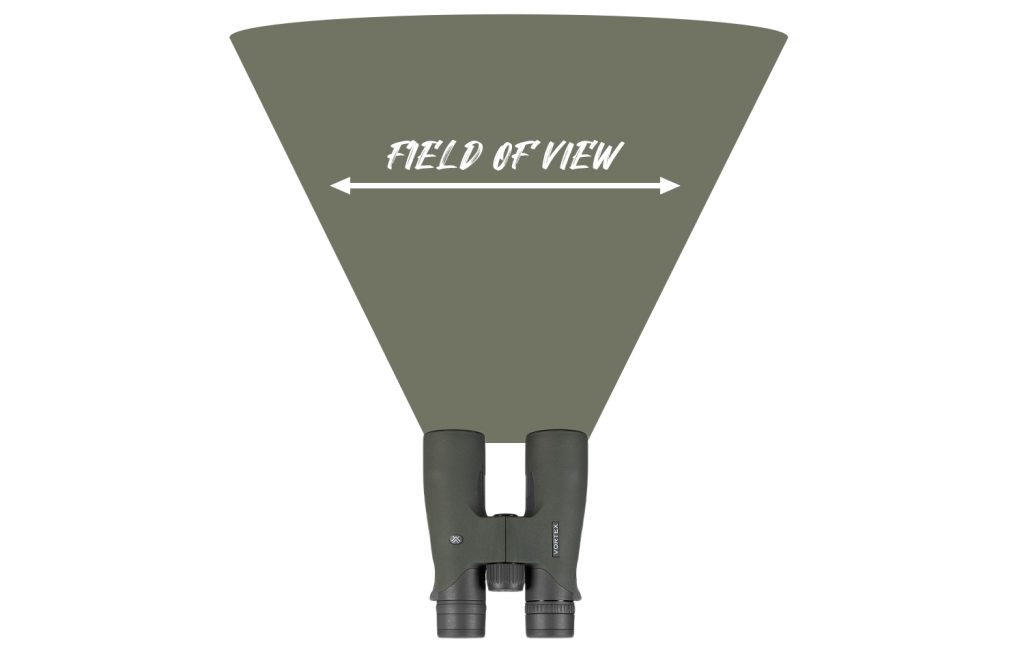
Our field of view when looking through optics is much less than we have with the naked eye, but the benefit of optics is the magnification.
Magnification:
A measure of how much larger objects appear that we look at. A common binocular setup is 10x42. The 10 means that the binoculars have a factor of 10x magnification; the 42 is the diameter of the objective lens in millimeters. Objects will appear 10 times larger when viewed through the optics than they do to our naked eye.
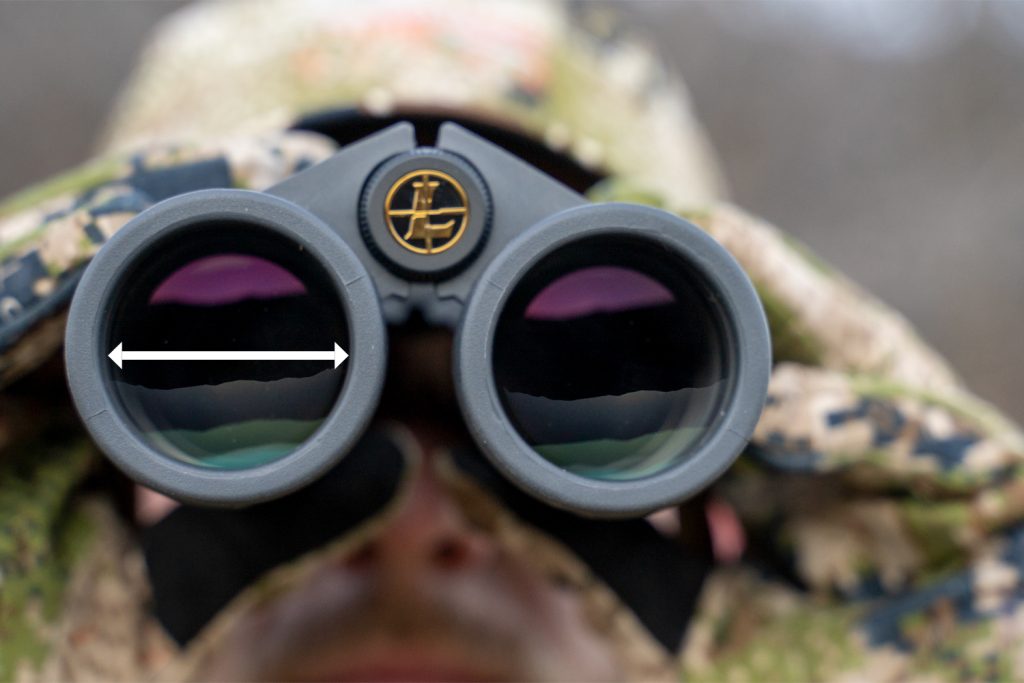
Objective lens diameter:
The objective lens is the lens opposite the one you look through with your eyes. Larger objective lenses allow more light into the optical system, making objects appear brighter, and can really be beneficial when glassing at first and last light.
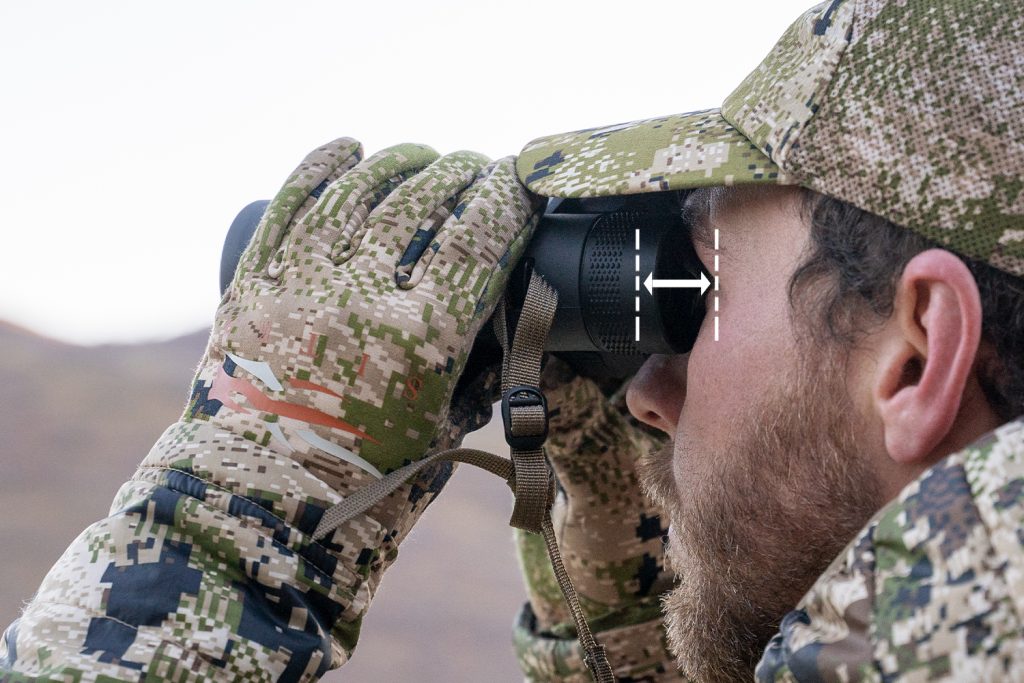
Eye relief:
In Layman’s terms, this is the distance from the surface of an eyepiece within which the user’s eye can obtain the full field of view. If a viewer’s eye is outside this distance, the field of view will be reduced. People who wear glasses will usually need more eye relief than those that don’t.
Vignetting:
Reduction of an image’s brightness or saturation toward the periphery (outside) of the image compared to the center. Basically the image appears most clear at the center and is noticeably less clear toward the edges. This is sometimes referred to as the ‘hotspot’ affect.

These are just a few basic terms when it comes to optical systems, but knowing what the numbers mean in the specifications section can really help you understand more about them.
Buy once, cry once
I think the most important thing you can do when buying optics is to buy once, cry once! I’ve heard many people talk about how if they’d initially bought the optics they have now rather than upgrading 2, 3 or 4 times and selling old optics to fund new ones, they would have saved money in the long run. Stay within your means, but do all you can to make sure you’re buying the very best you can afford. You won’t regret it.
A tripod is a must
In order to get the very most out of your optics in the field, you need to have a quality tripod to put them on. Tripods come in all different sizes and weights; some are lighter and smaller – ideal for backcountry trips, while others are larger, heavier and more ideal for glassing from the truck. Some people like to have multiple tripods, some prefer just one. Whatever your preference is, don’t skimp on a tripod after putting your hard earned money into a great set of optics.
Try a tripod bino adapter
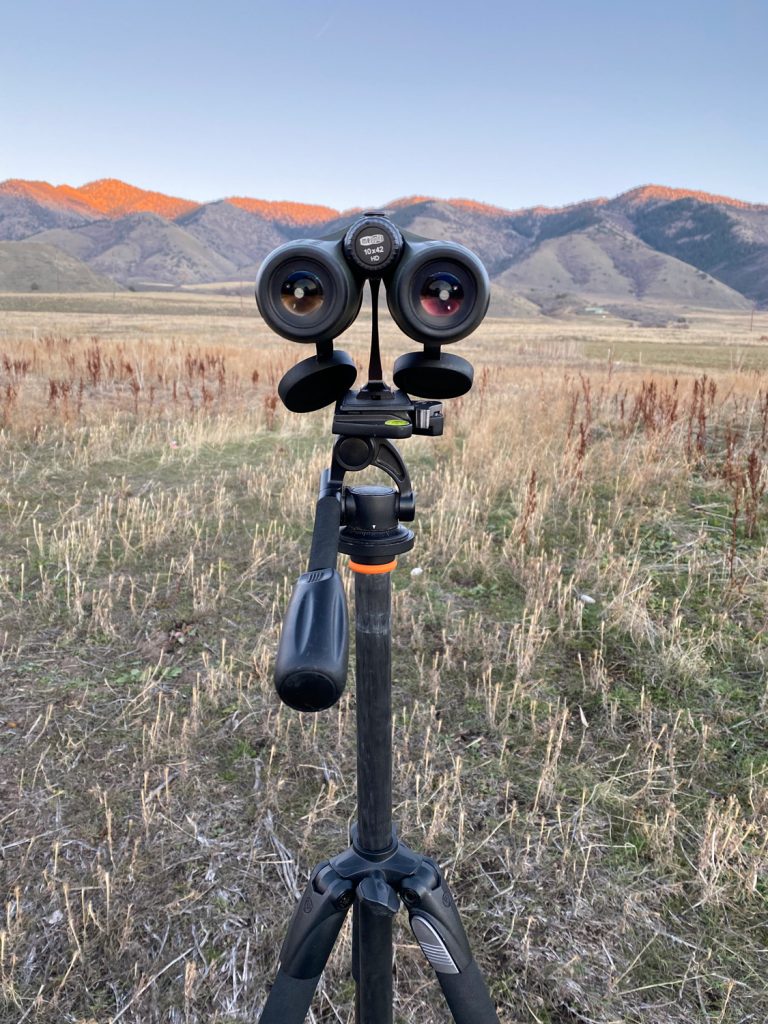
A binocular tripod adapter can really be a game changer. You don’t realize how much your binos quiver and shake when you’re holding them in your hands (even when resting your arms on your knees) until you’ve used them with an adapter on a tripod. Using the tripod head to pan slowly back and forth is so much smoother than slowly twisting yourself from side to side. You won’t realize what you’re missing until you try one!
Clean and maintain your optics regularly
Taking care of your optics and keeping them clean may seem like a no-brainer, but it always surprises me how rough some people treat their optics. I looked through a guy’s Swarovski spotter this year and it was anything but clear; there were smudges all over both the eyepiece and objective lens and I could barely make out any detail on a hillside we were looking at just a few hundred yards away. Make sure you’ve got some way to store and protect your optics, both while in the field and at home. I always wear my binos in a chest pouch, both for easy access as well as protection. I got the body army padding for my Swarovski spotter and I think it has really helped to protect it. I also keep my scope in a zippered pouch in my pack until I need to use it, and when I’m done it goes right back inside.
Always have a microfiber cloth handy to clean any optical surface. These cloths are typically softer, safer on glass, and most importantly they aren’t exposed to wind, rain and dirt all day like your shirt is. Don’t wipe your optics with your clothes if you can help it. You may not be able to see it, but your clothes have sweat and dirt on them that can dirty and/or scratch your lenses.
On top of in-field care, in the off season or between trips, take some time to really clean your optics. Get a lens cleaning pen and give your optics a good cleaning. Some manufacturers will actually let you send your optics in and they’ll take them apart and professionally clean them for you. If you’re interested in this, check with them first to see if they offer these services, how long the turnaround time will be, and if there will be any fees associated with such a cleaning.
Digiscoping
I think digiscoping is pretty fun. It always helps me relive an experience when I can look back through pictures I took of animals and scenery. I especially love looking at pictures taken of animals through my optics, using setups like Phone Skope. I also have a Bluetooth shutter remote that connects to my phone and allows me to take pictures and videos without having to tap on the screen. I’ve really enjoyed using it and not having my videos be blurry in the beginning as the camera stabilizes itself from me tapping on the screen to start the video.
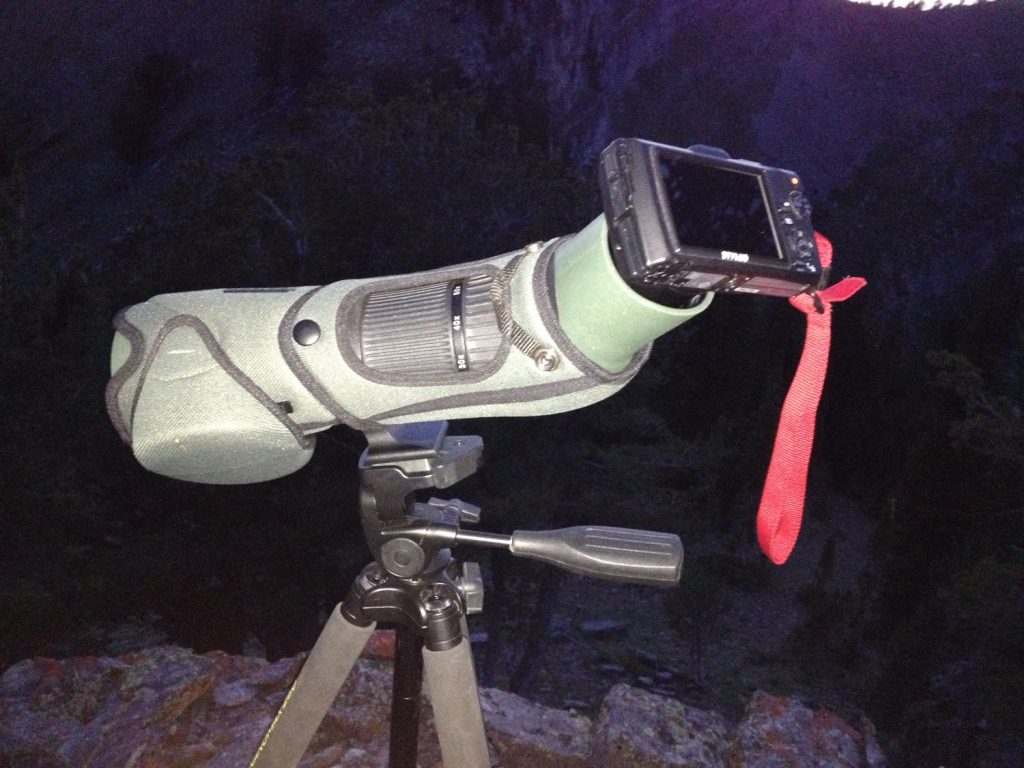
There’s also other digiscoping setups out there that are a little more involved than a Phone Skope. I can’t take credit for coming up with this myself, but I have a really cool setup that I’ve used many times with my Swarovski spotter. I have an Olympus TG-3 digital camera that I can attach to my spotting scope. The TG-3 is 100% digital zoom so there’s no lens that sticks out of the camera body as you zoom in. I have a threaded adapter that is attached to the camera, and there’s a step-up adapter it screws into, and the other side of the step-up adapter screws on to the eyepiece of my spotter once I’ve unscrewed the plastic eyecup. This system takes a little bit of time to setup, but I think it yields really clear pictures. It’s fun to experiment and try out new things. I’m sure this setup or something very similar could be assembled for other makes and models of spotting scopes too.
Your optics are one the biggest advantages you have on a hunt. Make sure you’re getting the most out of your optics; care for them and they’ll make your hunts so much easier and more enjoyable!
